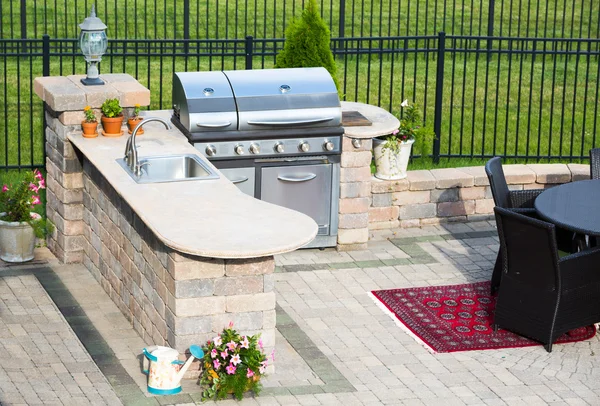
Transforming your backyard into a culinary oasis starts with a professional-grade grill that elevates your outdoor cooking experience. While the allure of a built-in grill is undeniable, the installation process requires more than just positioning equipment; it calls for meticulous planning, safety measures, and compliance with local regulations. Whether you’re an avid home chef or simply love entertaining under the stars, understanding what it takes to set up a permanent outdoor cooking station will save you time, money, and potential headaches.
Planning Your Built-In Grill Installation
Choosing the right location for your grill is crucial. Opt for a space that allows for adequate ventilation and access to your kitchen and dining areas. Consider prevailing wind patterns to minimize smoke exposure to your home or neighbors. Additionally, ensure the ground is level for ease of access to utility connections.
Key Measurement Guidelines
Built-in grills come with specific clearance requirements essential for safety:
- Side Clearances: Minimum of 6 inches from combustible materials, with a recommendation of 12 inches.
- Back Clearance: At least 6 inches away from walls or fencing.
- Overhead Clearance: Maintain 24-36 inches away from covered structures.
- Service Access: Ensure easy access to gas connections and control panels.
Utility Connections: Gas and Electrical Considerations
The installation of gas lines is one of the most intricate aspects of setting up your grill. Natural gas is often the preferred choice for consistent heat, but it necessitates professional installation. Before digging, contact your local utility company to mark existing gas lines, as most areas will require permits for new line extensions.
Electrical Requirements
Modern built-in grills often include electric components, such as rotisserie motors and lighting. When planning electrical connections, ensure the installation includes:
- GFCI Outlets: All outdoor electrical connections must be GFCI protected.
- Weatherproofing: Use outdoor-rated electrical boxes.
- Circuit Planning: A dedicated 15-20 amp circuit is recommended for electrical loads.
Foundation and Structural Elements
A solid foundation is vital for the longevity and stability of your grill. Concrete pads are commonly used and should be poured at least 4 inches thick, extending six inches beyond the grill’s footprint. Surrounding materials should meet fire safety standards while enhancing aesthetic appeal.
Choosing Fire-Resistant Materials
Select materials that can withstand high temperatures, such as:
- Natural Stone: Durable options like granite and marble.
- Concrete Countertops: Custom surfaces with integrated features.
- Stainless Steel: Weather-resistant and easy to maintain.
Permit Requirements and Safety Measures
In most jurisdictions, installing a built-in grill will require permits. Check with your local building department to understand which permits you need. Common types include:
- Building Permits: For structural work.
- Gas Permits: For any gas line installations.
- Electrical Permits: For any electrical modifications.
Factor in permit processing time, as approvals often take 1-3 weeks. Lastly, ensure you notify your homeowner’s insurance company about your installation to potentially gain coverage discounts.
Cost Estimations and Budgeting
When budgeting for your built-in grill, remember that installation costs can vary widely based on complexity. Expect expenses to range from:
- Basic Installations: $2,000 – $5,000 for simple setups.
- Mid-Range Projects: $5,000 – $12,000, including additional features.
- Premium Installations: $12,000 – $25,000+ for comprehensive outdoor kitchen designs.